Chocolate glazes are a wonderful way to add a rich, smooth, and glossy finish to cakes, pastries, and other sweet treats. However, many people struggle with glazing that hardens too much, causing it to crack when cutting into the dessert. Fortunately, there are a few tips and tricks you can follow to ensure your chocolate glaze remains smooth and flexible. In this recipe, we will explore three different methods for making chocolate glaze that will not break when sliced.
Ingredients
Option 1:
- 100 g butter
- 2-3 tbsp cocoa powder
- 1 tbsp flour
- 1/2 tsp powdered sugar
- 5 tbsp milk
- Vanilla extract
Option 2:
- 150 g dark chocolate (high quality)
- 1 tbsp cocoa powder
- 1/2 cup sugar
- 1/2 cup water
Option 3:
- 125 ml heavy cream
- 125 g dark chocolate
Instructions
Option 1:
Start by melting 50 g of butter in a saucepan over medium heat. Add the cocoa powder, flour, powdered sugar, and milk, stirring constantly to prevent lumps. Allow the mixture to come to a boil while continuing to stir. Once everything is fully combined and thickened, remove it from the heat and stir in the remaining 50 g of butter and a few drops of vanilla extract. The vanilla extract adds a rich and warm flavor that enhances the chocolate’s natural taste. If the glaze begins to set too quickly, simply add a little more milk to adjust its consistency. This option results in a thick, velvety glaze perfect for frosting cakes or covering donuts.
Option 2:
For this version, place 150 g of high-quality dark chocolate in a heatproof bowl. Set the bowl over a pot of simmering water (double boiler method). Stir gently as the chocolate begins to melt. Once the chocolate is completely melted and smooth, add 1 tablespoon of cocoa powder, 1/2 cup of sugar, and 1/2 cup of water to the mixture. Stir continuously to combine the ingredients and heat the glaze gently until it thickens. This version produces a glossy, shiny finish that is ideal for decorating cakes, brownies, and cookies. It also has a slightly richer flavor due to the addition of sugar and cocoa powder. Once thickened, pour the glaze over your cake or treat, smoothing it out with a spatula.
Option 3:
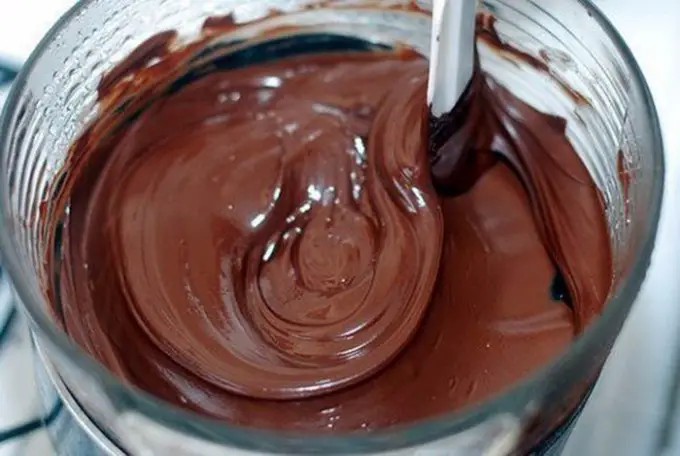
In a small saucepan, warm 125 ml of heavy cream over low heat. Be careful not to let it boil, as boiling cream can change its consistency and prevent the glaze from thickening properly. Once the cream is warm, remove it from the heat and add 125 g of dark chocolate, broken into small pieces. Stir gently as the chocolate melts into the cream. The result will be a smooth and glossy ganache that can be poured over your cake or dessert for a silky finish. This option creates a luxurious and smooth glaze that will not crack when the cake is cut. It is especially great for chocolate cakes or tarts.
Tips for a Perfect Chocolate Glaze:
1. Consistency is key: If your glaze gets too thick as it cools, simply warm it slightly or add more milk (for Options 1 and 3) or water (for Option 2) to achieve the right texture.
2. Let it set properly: After applying the glaze, let it cool completely at room temperature to allow it to set evenly. Avoid refrigerating the cake right away, as this can cause the glaze to harden too quickly.
3. Use high-quality chocolate: The quality of the chocolate you use will greatly affect the final result. Opt for a good quality dark chocolate that contains at least 60% cocoa for a rich and intense flavor.
By following these three methods, you’ll be able to create a beautiful chocolate glaze that stays smooth and flexible, making it easy to cut through without cracking. Whether you’re glazing a cake, brownies, or cookies, these tips will help you achieve a professional and polished finish every time.